Introduction
In today’s fast-paced technological world, the speed of delivering new and latest software is more important than ever. The IT industry focuses on faster, continuous, and error-free delivery of software to its customers. This process is based on Continuous Integration (CI) and Continuous Delivery (CD).
The pre-requisite for continuous delivery is continuous integration. The moment you change your code, a CI job is initiated, creating a build and deploying it to a dev environment. It helps you verify the changes made to your application.
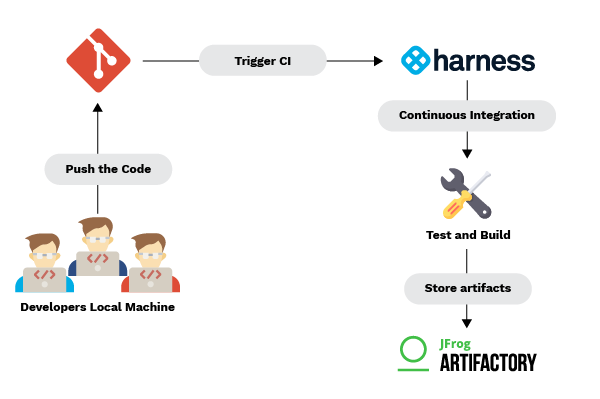
In this article, we are going to understand the CI process using three different platforms:
- GitHub – platform to store the application code.
- Harness – platform to fetch the code from GitHub or similar platforms, run CI jobs, create the build, and generate artifacts.
- JFrog Artifactory – platform used to store the artifacts generated by the Harness CI pipelines.
This article focuses on how to create and run the CI pipelines, generate artifacts, and upload them to artifactory.
Continuous Integration (CI) Process
Before moving ahead, we suggest that you create accounts on all the above-mentioned platforms.
First of all, let’s start with the application code. I have taken an example of an Angular JS application. It creates a build.zip file, which is uploaded to the JFrog Artifactory.
The zip file has labels that help us identify the application versions. These versions are based on the Harness Job ID. It is just for demo, but you can create builds with different versions, as per your project requirements and upload them to the JFrog Artifactory.
Below is the link for your reference. The Harness folder in the repository contains the YAML script for the Harness pipeline.
https://GitHub.com/krupangbuddhdev/CI-demo
Let’s start with the creation of the Harness pipeline. Below is a Harness dashboard:
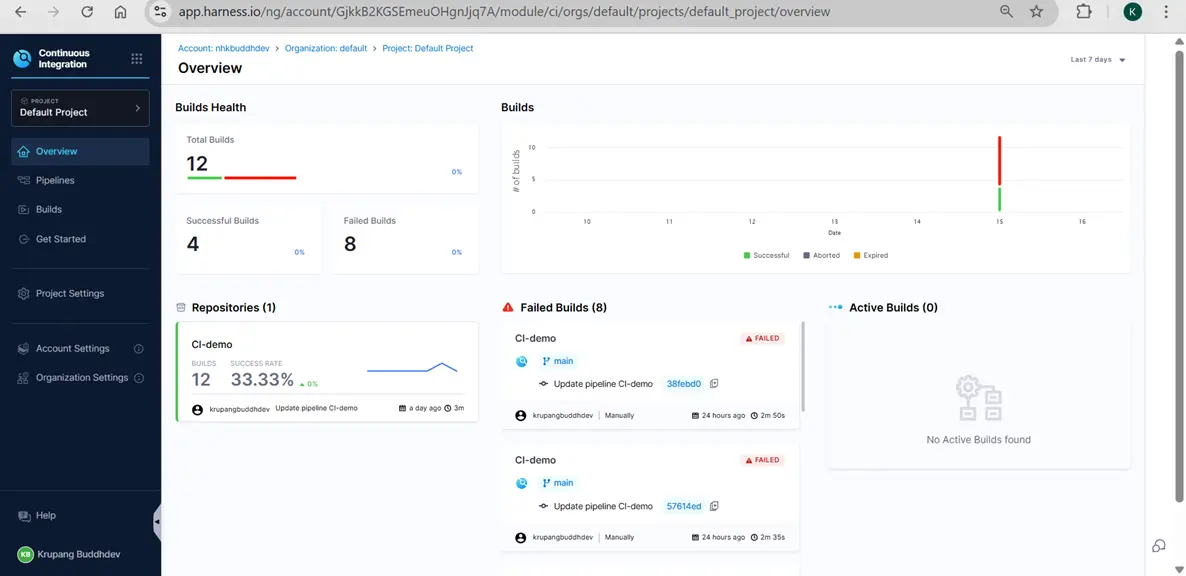
Fig 1 – Harness Dashboard
We will now create a pipeline. When you click on Pipelines, you will see a screen like the one below.
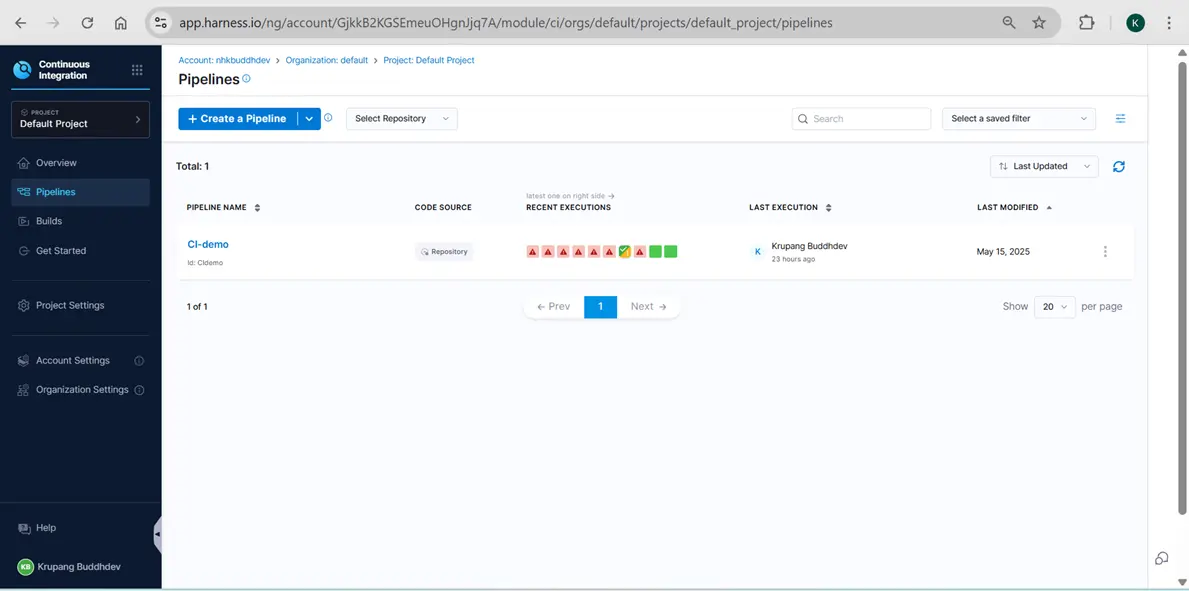
Fig 2 – Pipelines Section
Click on the ‘Create a Pipeline’ button and you will see the screen below.
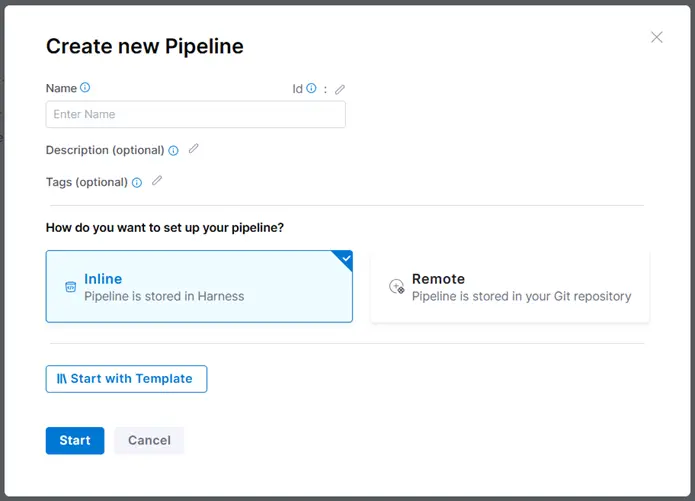
Fig 3 – Create Pipeline
There are two options available – Inline, which is used to store pipelines inside the Harness code repository, or your own GitHub repository.
If you select the Inline option, you do not have to fill in all the details. Just click on the Start button and proceed with the Add Stage option.
Then enter the pipeline name, description, and select one of the two options, i.e., Inline or Remote. If you choose Remote, you need to fill in all the repository details and then click on the Start button.
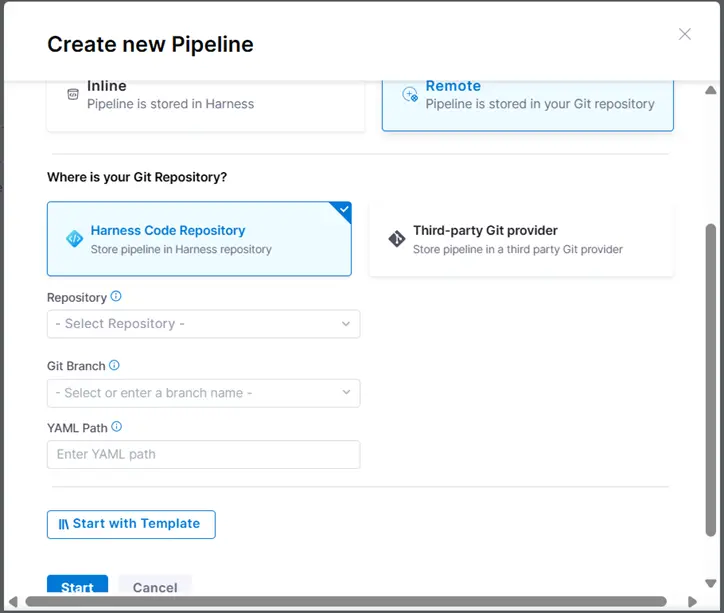
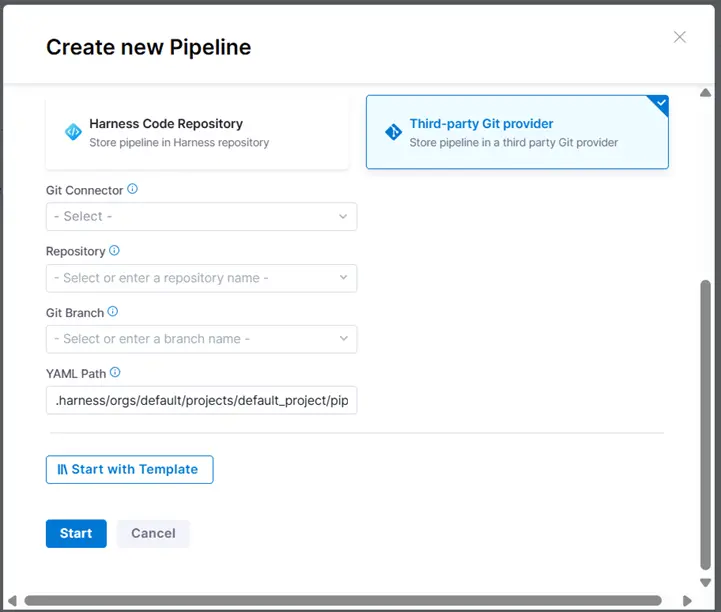
Fig 4 – Pipeline with Remote option
If you select the Third-party Git provider option, then you need to create a GitHub connector, Harness. With this, you can store your pipeline, input sets, and other components of Harness in your repository. All of them will be stored in the YAML format.
The benefit of this is that if you mistakenly delete the pipeline from Harness, you can easily recover it with the help of the YAML script stored in your repository.
To create the GitHub connector, a Personal Access Token (PAT) is required. You can generate this token from your GitHub settings, and set the necessary permissions. All the details are provided in the link below.
After completing the above steps, click on the Start button and you will see the screen below.
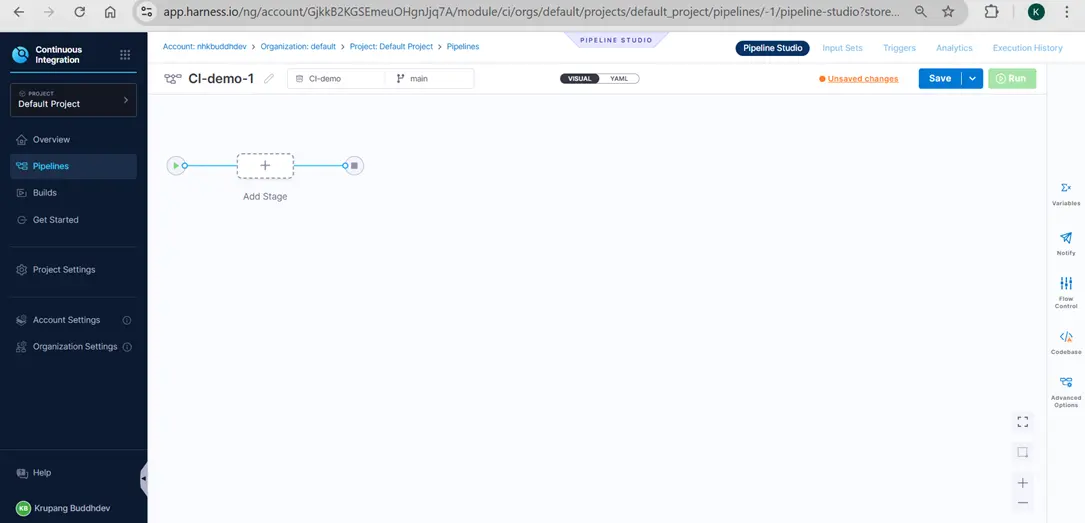
Fig 5 – Pipeline initial stage
Click on the Add Stage button and you will see the output below. Select the Build stage, fill in all the required details, and click on Set Up Stage.
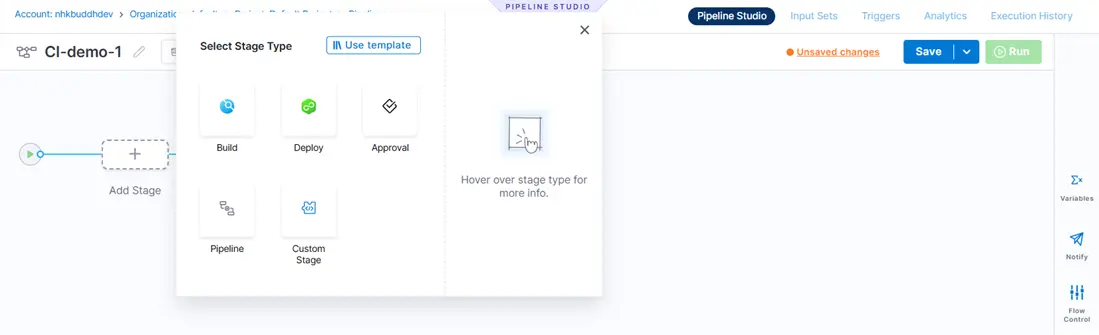
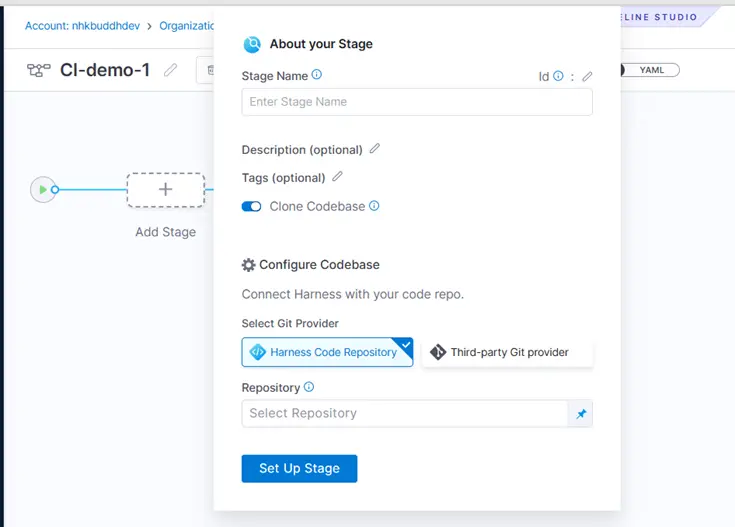
Fig 6 – Add Stage
Select the Infrastructure based on your requirements. I want to run the pipeline on Harness cloud, so I am selecting the first option. Select the required OS and Architecture and click Continue.
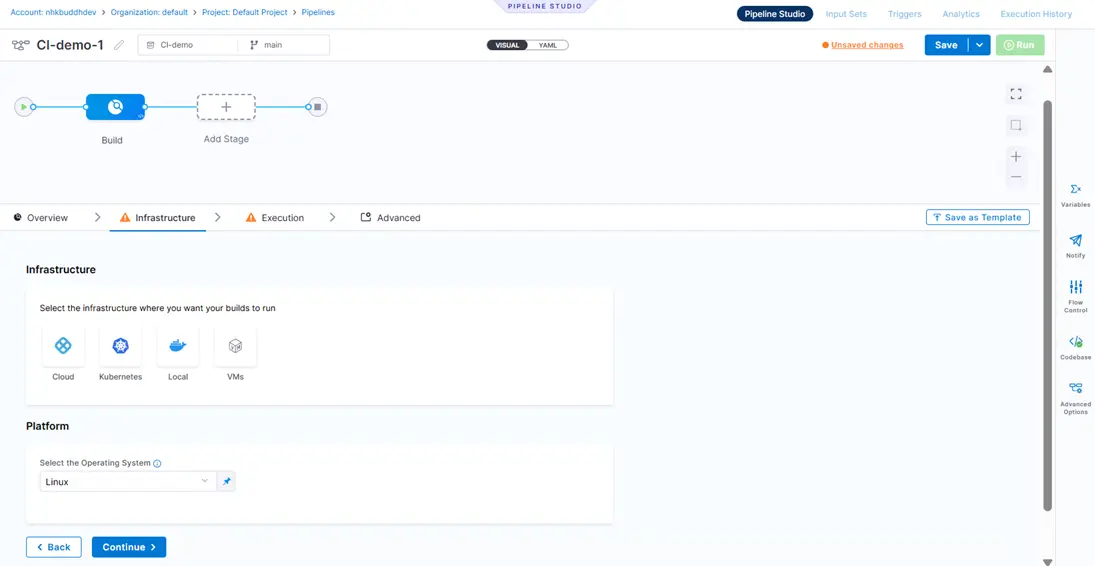
Fig 7 – Select Infrastructure
Click Add Step in the execution section. You will see the screen below.
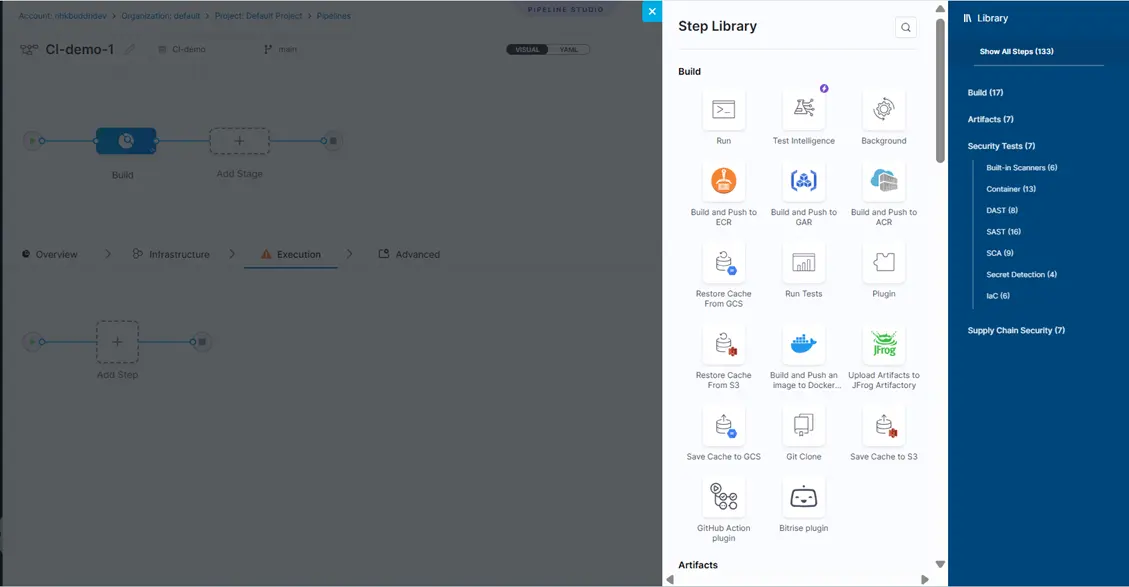
Fig 8 – Add Run Step
Next, we are going to build the artifact by fetching the code from our GitHub repository. Click the Run button for this. Enter the name of the step, select the shell in which you want to run your code. For example, Bash, sh, or Python.
Enter the commands in the Command section to run your code. Then in Optional Configuration, provide the Container Registry and Image, Output variables, and Environment variable inputs required by your code.
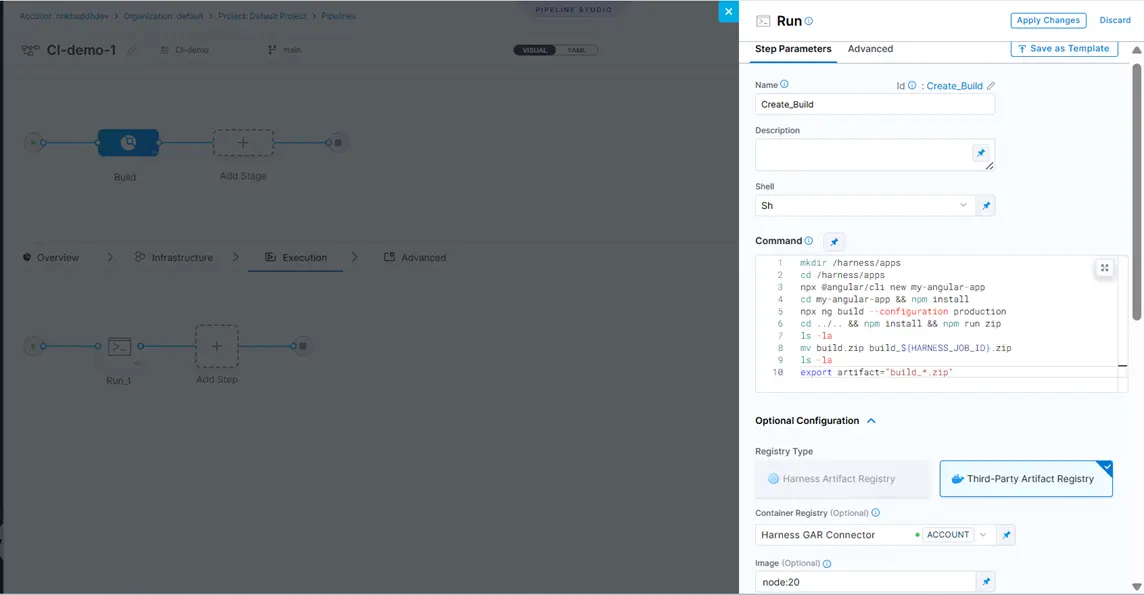
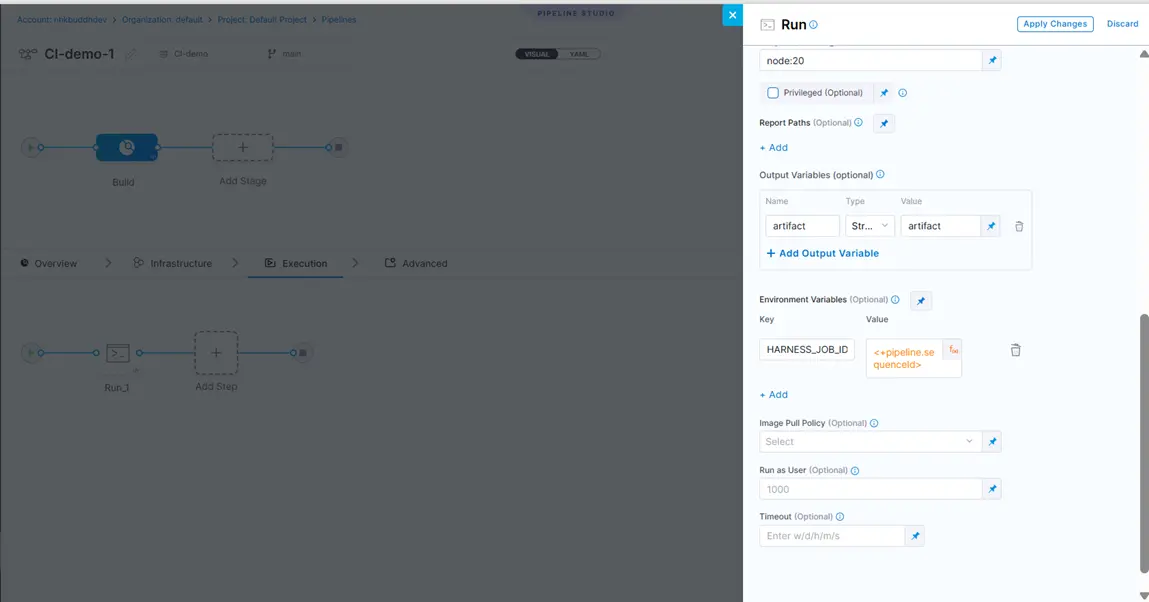
Fig 9 – Configuring the Run Step
Then, go to the Advanced tab, where you find the following four configuration options:
- Condition Execution – It enables you to control whether a step run based on specified conditions, such as evaluating true or false.”
- Failure Strategy – It allows you to include failure strategies such as whether you want to ignore the error, retry step, or abort step.
- Looping Strategy – It helps optimize your pipelines by running steps or stages concurrently or running steps multiple times with different inputs.
- Policy Enforcement – This topic explains steps to create policies using the Harness Policy as a code and apply them to your pipeline steps.

Fig 10 – Advanced Tab in Run step
To run this step repeatedly, select the Conditional Execution and set it as true.
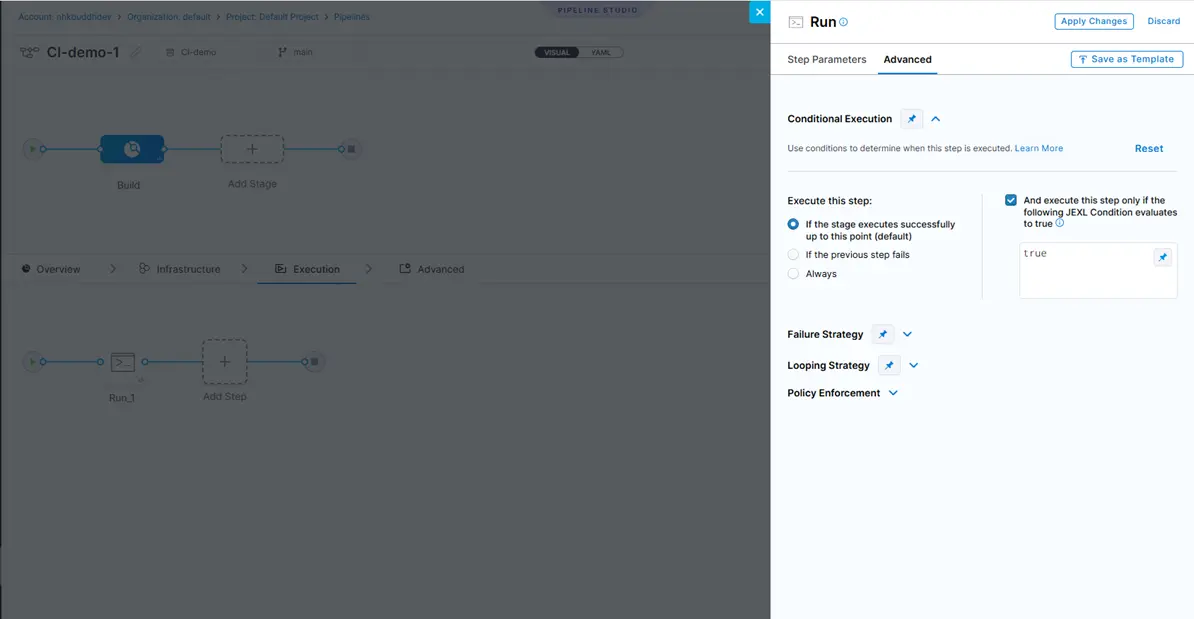
Fig 11 – Conditional execution
After creating the Run step, we add two steps for security scanning of the build—SonarQube and Protecode. Both perform activities like security scanning and code optimization, bug detection in code, code quality check, and removal of code duplication.
Click on Add Step and select the SonarQube option. Fill in all the required details like name, scan mode, scan configuration, workspace, authentication details, project key, and log level as shown below. Keep Conditional Execution true in the Advanced tab.
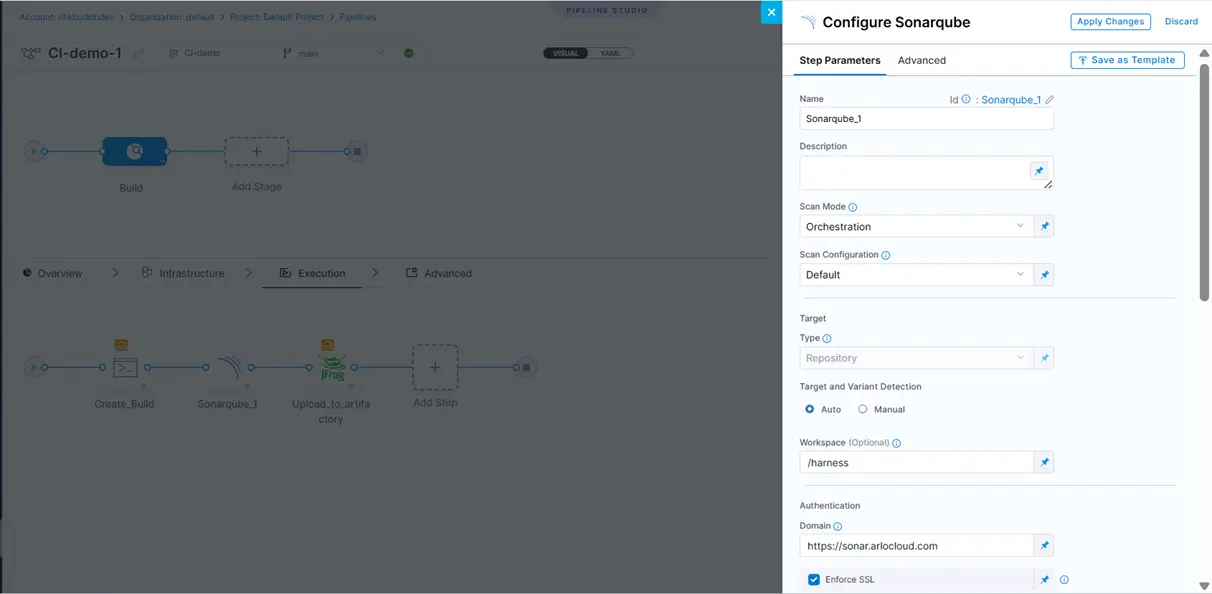
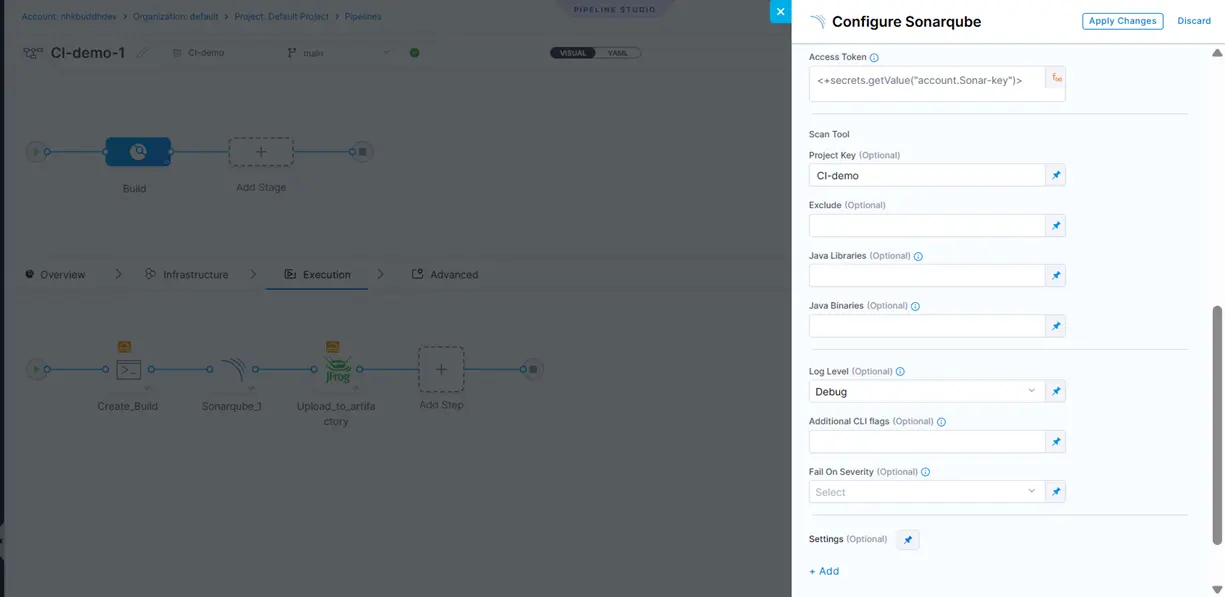

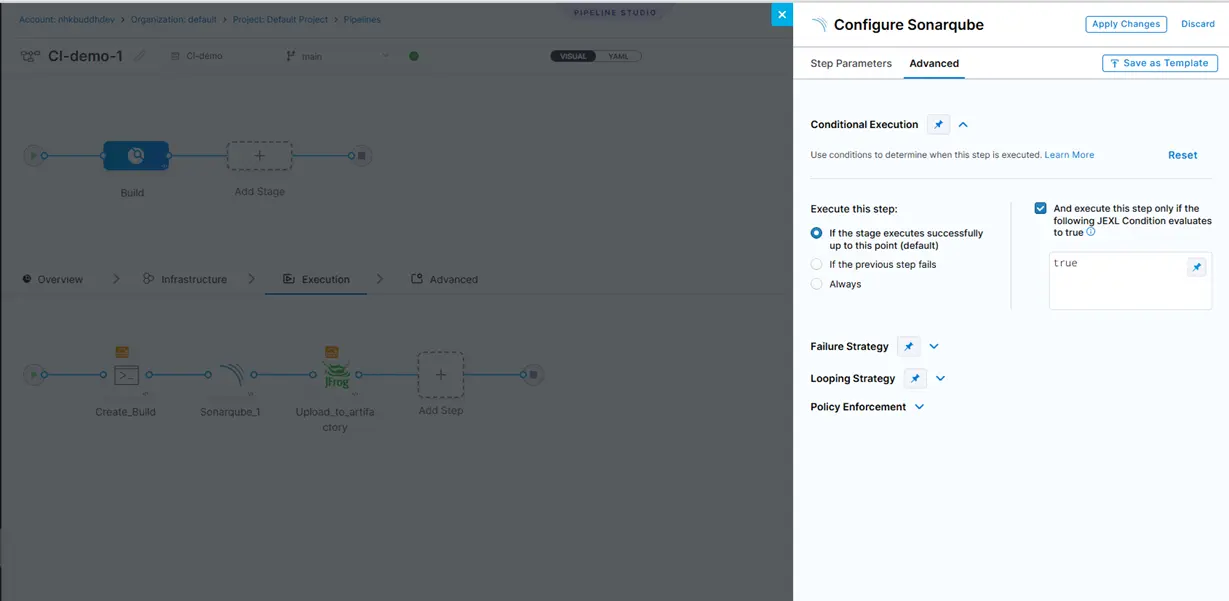
Fig 12 – SonarQube
After that, add a new Run step called Protecode. This step is for security scanning of the builds. Also keep Conditional Execution true in the Advanced tab.
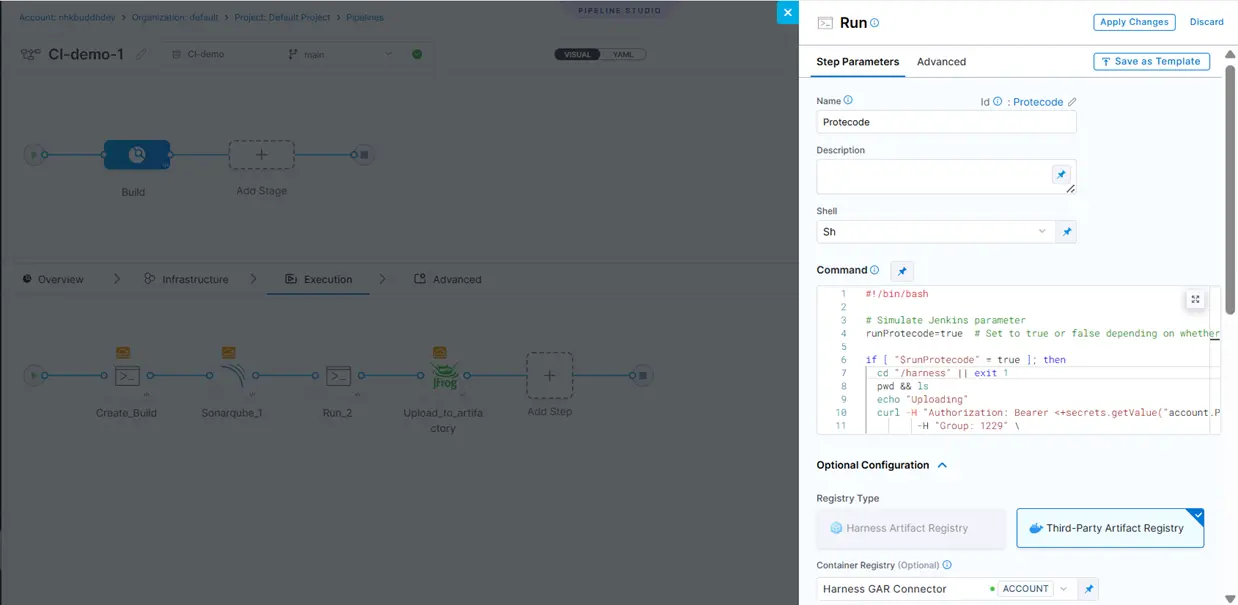
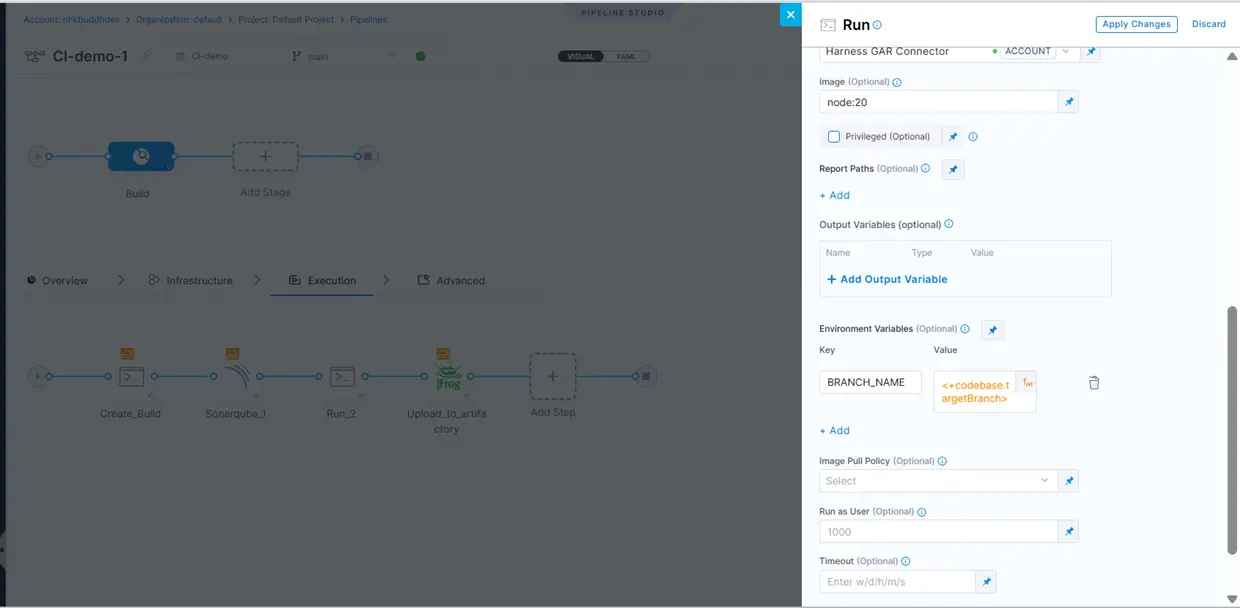
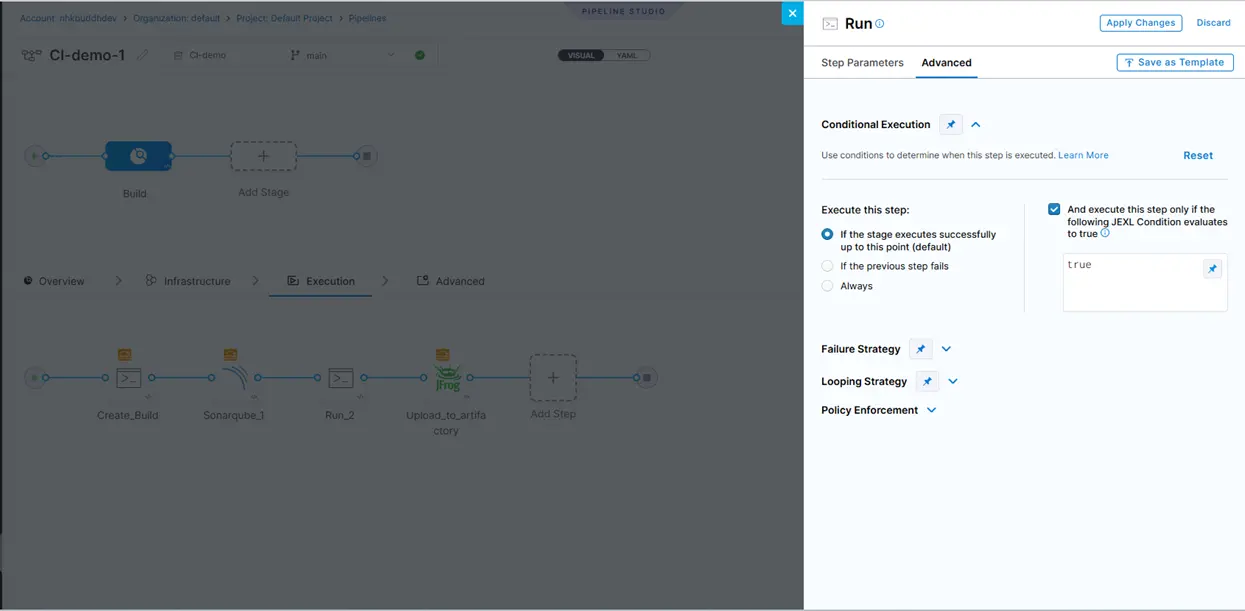
Fig 13 – Protecode
Next, add an Upload Artifacts to JFrog Artifactory step. Using this, we will upload our artifacts to JFrog Artifactory. To add this step, click on Add Step and then select the Upload Artifacts to JFrog Artifactory as shown below.
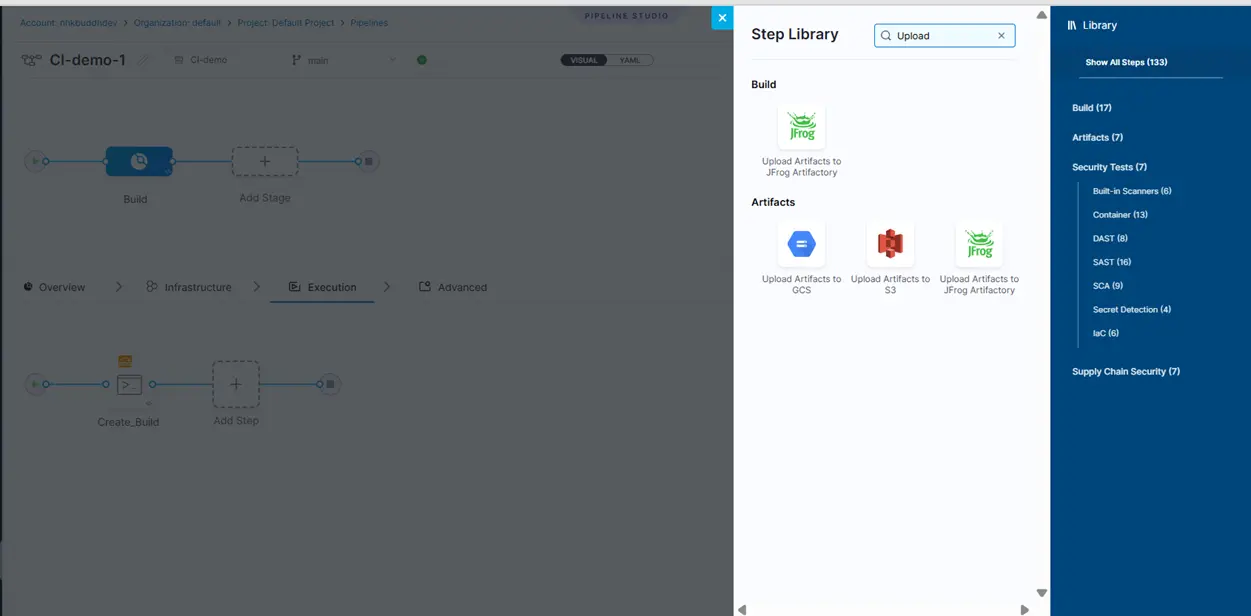
Fig 14 – Upload to Artifactory step selection
Like GitHub connector, we also must create a JFrog Artifactory Connector. The reference link for the same is given below.
After creating and selecting the connector, add the Target Path and Source Patch, in the same step. The target path is the repository path of the JFrog repository. Source Path is the artifact that we have exported as an output variable, in the Harness CI pipeline.


Fig 15 – Target and Source Paths

Fig 16 – Upload to Artifactory step configuration
After creating the required, click the Apply Changes button in the top right corner.
Note: Type and number of steps and stages depend on the complexity and requirements of your project.

Fig 17 – Apply Changes button
After applying the changes, click the Save button in the top right corner. Your pipeline is saved in the GitHub repository.


Fig 18 – Save button and Pipeline in GitHub
Note: If your master/main/develop branch is protected from merging, you have to first create a feature branch, save the pipeline in that branch, and then merge the feature branch with the master/main/develop branch.
When you merge the code with the master branch, the pipeline automatically gets created in Harness for the master branch, and you don’t need to manually create one again.
The pipeline has been created and is ready to run.
Click the Run button, select the Build Type, enter the Branch Name, and click Run Pipeline. You can also select other Build Type options, in addition to Git Branch, as shown below.
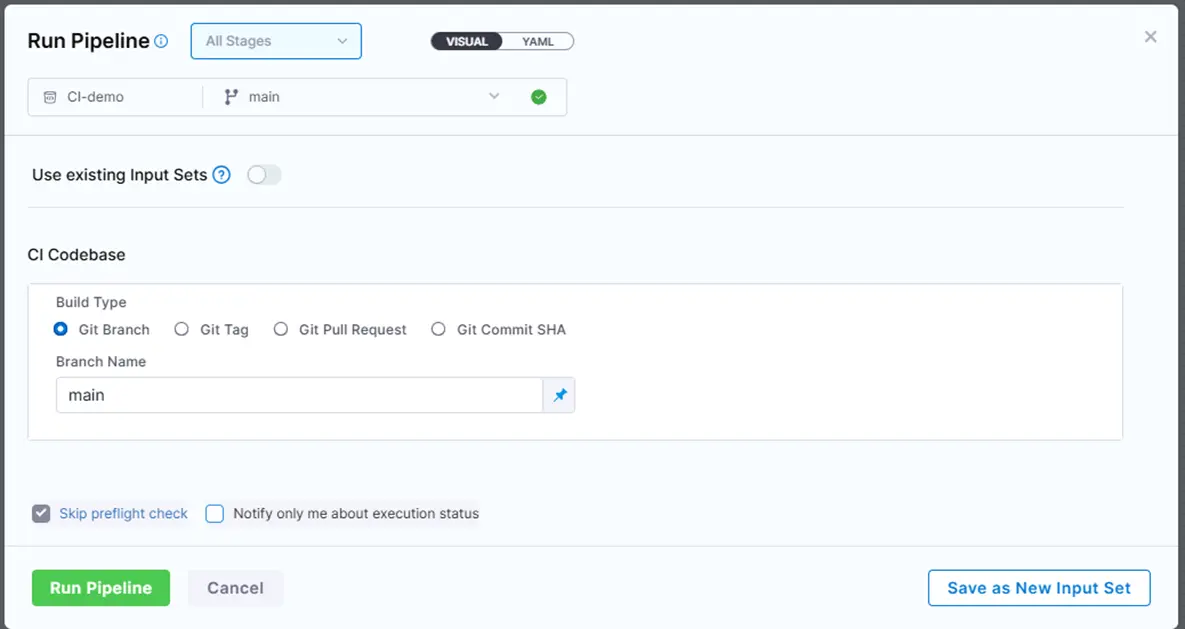
Fig 19 – Run Pipeline
When the pipeline is complete, a build_${HARNESS_JOB_ID}.zip is generated. We have exported this file as an artifact that gets uploaded to the JFrog artifactory. This happens in the next and last step—Upload to Artifactory.

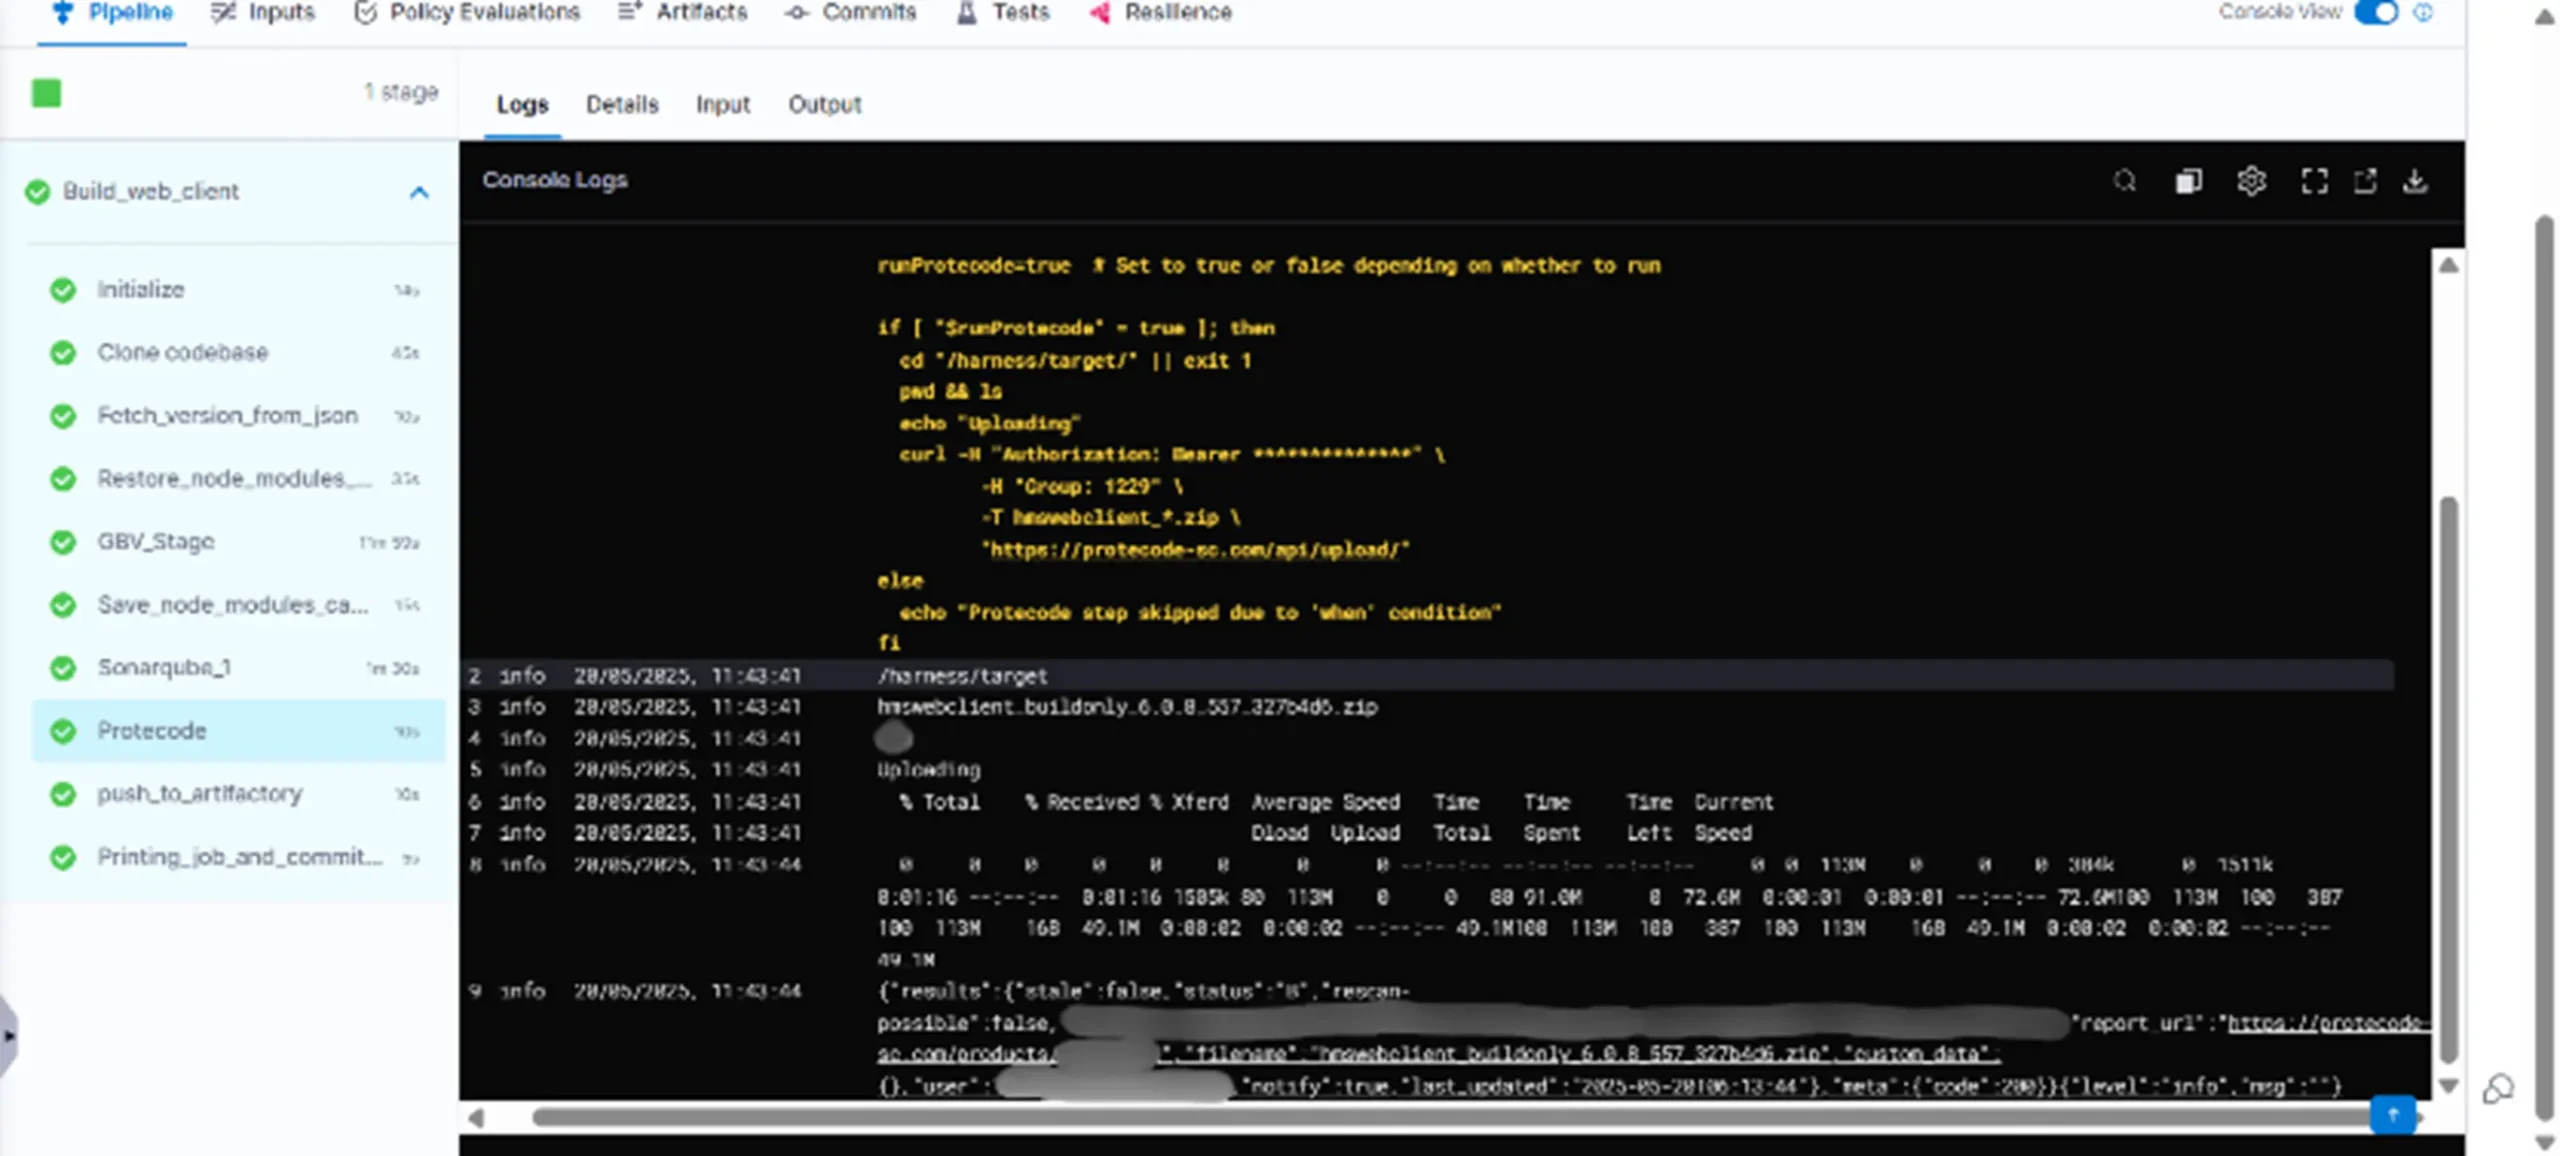
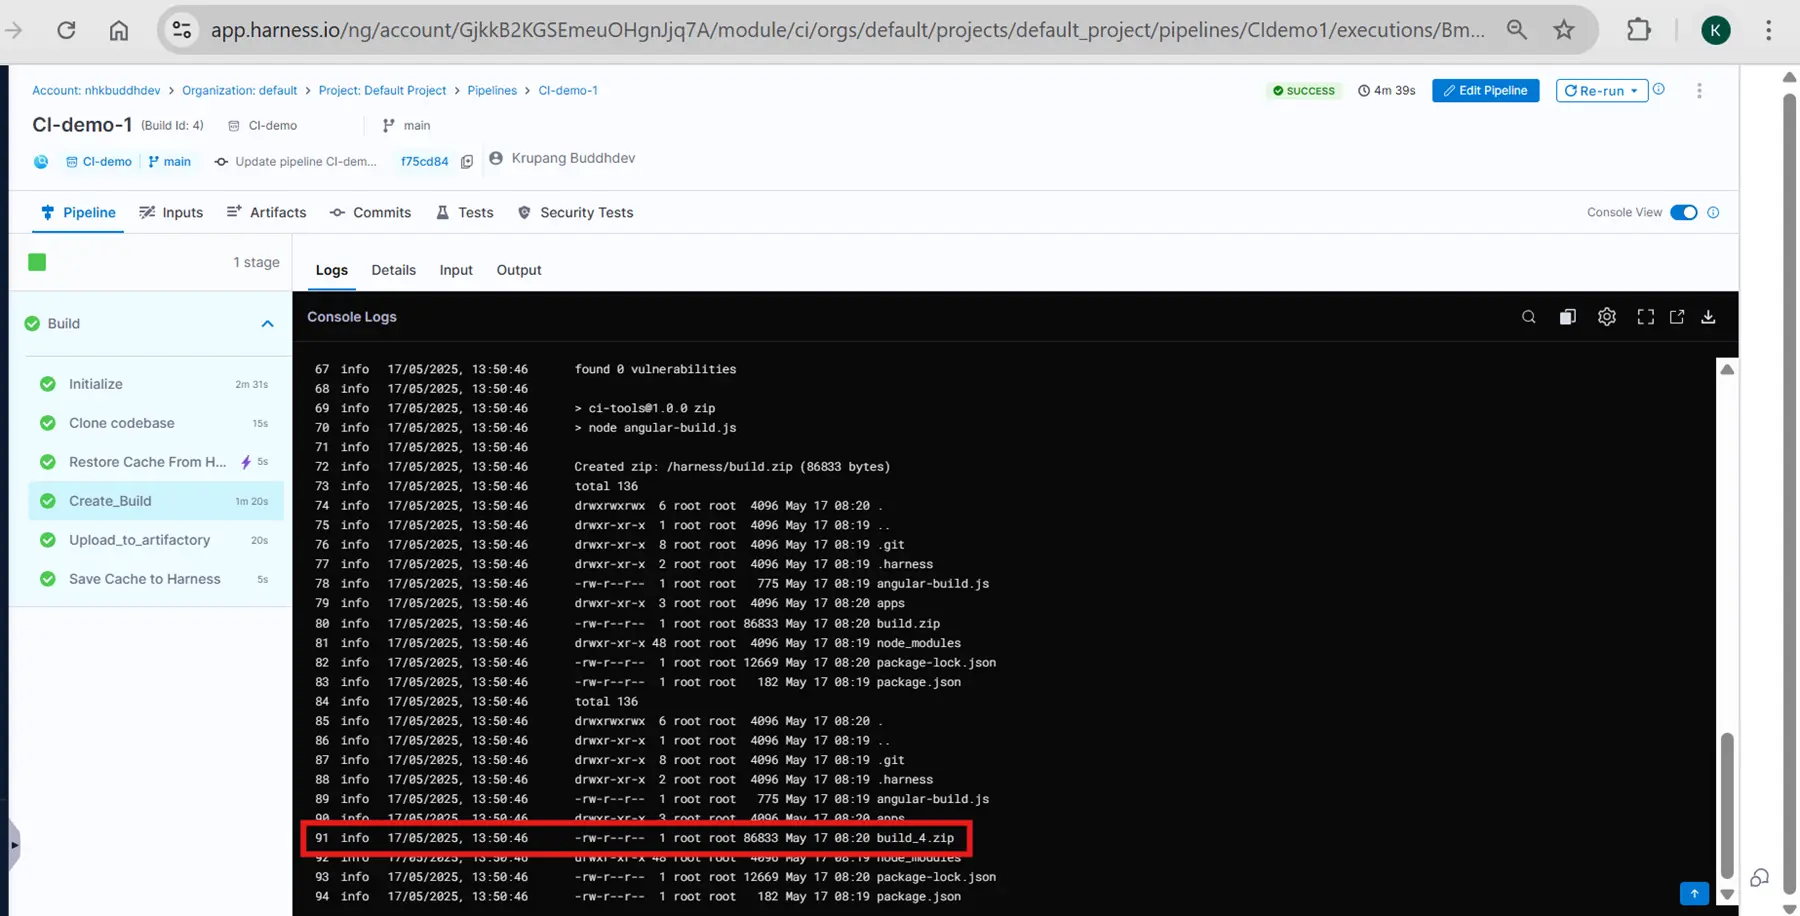
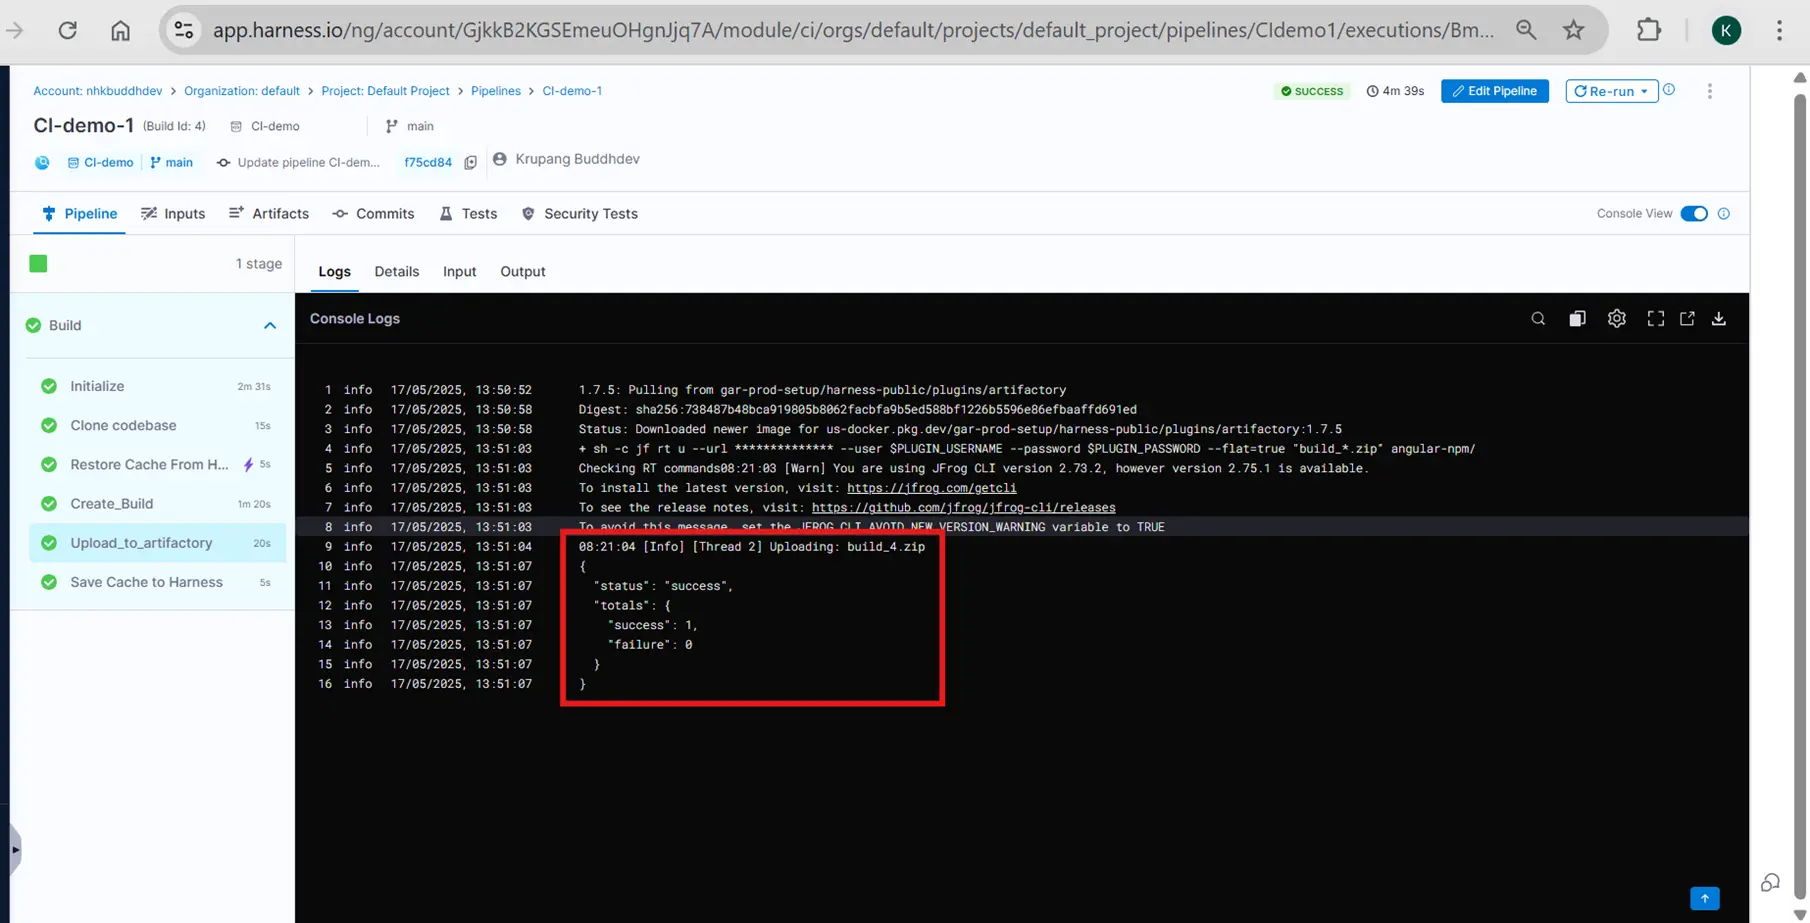
Fig 20 – Pipeline execution completed successfully
When the artifact has been successfully uploaded, you can check its details in the JFrog Artifactory, as shown below.

Fig 21 – Artifact details in artifactory
You can also create triggers in Harness that automatically run CI jobs based on a variety of Git events. This prevents you from the tedious task of manually running the pipeline every time you push your changes to GitHub, create, and merge PR.
In the above screenshots, you can see the Triggers section, with which you can create any number of triggers. You can also use Webhooks to trigger these pipelines.
Benefits of using Harness
Below are some of the benefits of the Harness tool:
- Pipeline as a Code
- Visual Pipeline Editor
- Test Intelligence – Faster Builds Through Selective Test Execution
- GitOps – ArgoCD and Flux
- Any Source Code Manager
- Security Scanner Integrations – SAST, SCA
- 3rd Party Approvals (SNOW/Jira) etc.
Many companies are using Harness for continuous deployment. If they use the same tool for CI, everything can be easily maintained under one tool.
Trending CI tools along with Harness
Software companies are using various CI tools, some of which are mentioned below. The choices of these tools depend on various factors like cost, project requirements, and tool efficiency.
- GitLab
- Jenkins
- Circle CI
- Travis CI
- AWS Code Pipeline
- Azure DevOps Server
Conclusion
Continuous Integration is a process of continuously building the changes made to your application code. Harness is one of the best options for all your CI/CD tasks. We can integrate Security Testing software like SonarQube and Protecode.
We can create CD pipelines, do error tracking, and manage code repositories using Harness. The motivation for this blog came from the migration of CI from Jenkins to Harness in one of our projects. The migration has been done single handedly by me. I spent a lot of time researching how to create a pipeline, what steps to select, and how to configure the pipeline.
This article is written to reduce your time and efforts of doing basic research, while creating your first CI pipeline through Harness.
References
-
https://developer.harness.io/docs/platform/connectors/code-repositories/ref-source-repo-provider/git-hub-connector-settings-reference/
-
https://developer.harness.io/docs/continuous-integration/use-ci/build-and-upload-artifacts/upload-artifacts/upload-artifacts-to-JFrog/
-
https://www.harness.io/comparison-guide/jenkins-vs-harness
-
https://developer.harness.io/docs/category/triggers/
-
https://developer.harness.io/docs/category/variables-and-expressions/
-
https://www.harness.io/blog/how-to-configure-your-builds-with-JFrog-artifactory-and-harness